How to Fold Hems & Weave in Ends: KAL Livestream Recap
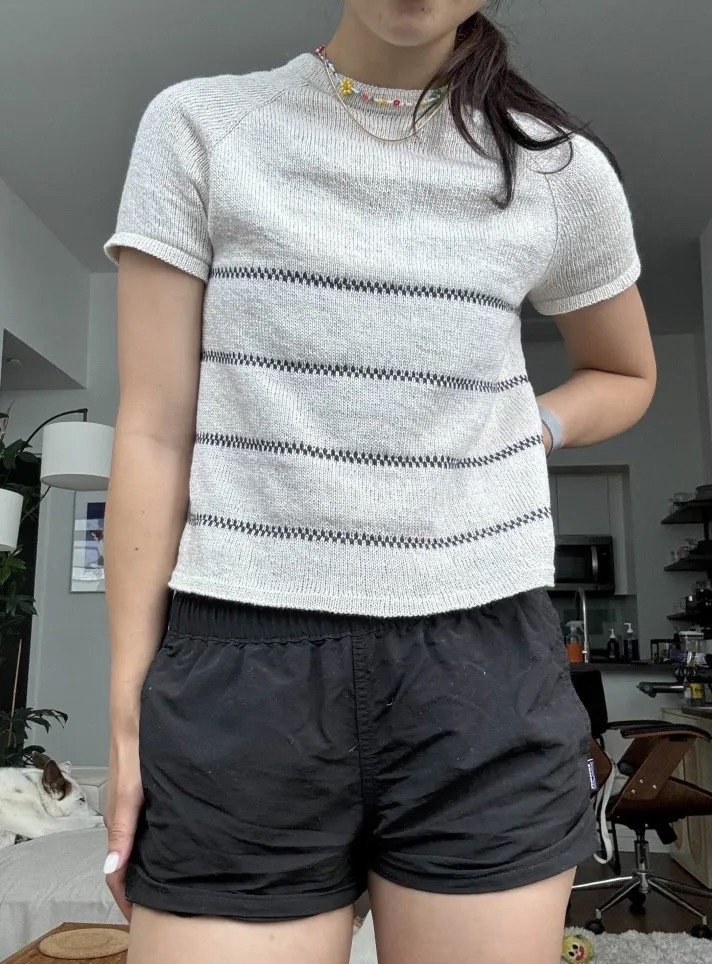
Hey knitting pals! We had a blast in this week's livestream celebrating our progress on the Staple Tee knit-along. We're in the home stretch now, focusing on those all-important finishing touches that make a hand-knit garment look polished. I even got to try on my Staple Tee, and the fit was perfect! It's a little longer than my original version, which is exactly what I was hoping for. But before I can wear it out and about, I have to focus on the finishing touches that this livestream was all about.
And if you missed this final instructional knitting livestream (or just want a refresher), grab your yarn and needles, and let's dive into the recap!
Please note that this blog post contains affiliate links. If you make a purchase after clicking one of those links, I earn some yarn money at no extra cost to you!
Key Highlights
Intro: A warm welcome to the core #teamlive fam and a peek into my weekend projects.
Big Announcement: This week's livestream was the last instructional one for the knit-along! And the final livestream on Sunday (July 28th) will be a celebration with prize announcements, so don't forget to submit your finished Staple Tee by July 27th at 11:59 PM EST.
Chat & Catch-Up: Weekend recaps, knitting progress updates, and shared experiences – always a fun way to start the livestream!
Knitting Know-How: We dove into the finishing techniques of folding hems and weaving in ends, with plenty of troubleshooting tips and Q&A along the way.
Homework: Finish your hems, weave in those ends, block your tee, and get ready to show off your finished Staple Tees next week!
Next Up: Join us for the final livestream, where we'll celebrate your knitting accomplishments and announce the prize winners!
Be sure to watch Livestream 7 replay for all the details!
A Closer Look at the Details
The Finishing Touches
We dove right into the exciting finishing techniques that will take your Staple Tees to the next level: weaving in ends to create a seamless look and mastering the art of whip-stitching those hems! With these skills in your toolkit, you'll be well on your way to completing your very own beautifully finished Staple Tee (just in time to wear it all summer long!).
Big Announcements and Reminders
This week marks the last instructional knitting livestream of the knit-along. Next week, it's time for a celebration, and I will be announcing the winners of the Staple Tee prizes! If you haven't already, don't forget to submit your prize submission form by July 27th at 11:59 PM. The winners will be selected randomly during the last livestream on July 28th at 12 PM.
Diving into the Knitting
Folding Hems: We started with the sleeve cuffs, folding the hem along the purl ridge with the tee inside out. Then, I showed you how to whip stitch the hem in place for a neat and tidy finish. I shared lots of tips along the way, like how to find where to do your first stitch and using stitch markers to keep your stitches even.
Weaving in Ends: Next, we learned how to weave in ends seamlessly along folded edges. I also showed you how to use waste yarn or leftover tails to fix any gaps or holes you might find in your knitting, by simply threading your tapestry needle and following the path of the stitches to close up those pesky openings. With just a few stitches, you can easily reinforce any weak spots and create a smooth, polished finish.
Blocking: To give your Staple Tee that extra polish, we talked about blocking towards the end of the livestream. It's a simple process that involves soaking, squeezing, and then gently shaping your garment to dry. It might sound a bit fussy, but it makes a world of difference! If you're looking for blocking mats, pins, or other tools to make the process easier, be sure to check out my Amazon storefront for all my favorite blocking essentials. I also mentioned that I have a handy blog post with more detailed instructions on blocking bulky knits (which also works for any garment) – check out the blog post if you'd like a step-by-step guide.
Getting Ready for the Big Reveal!
A few of you have already been sharing your progress with weaving in ends and blocking on Discord, and I've got to say, I'm impressed! Your knits are looking so good. I can't wait to see all your beautifully finished Staple Tees next week! Get ready for next week's livestream, where we'll showcase even more finished tees.


Participant Interaction
Chatter from the KAL Community: All the Feels!
#TeamLive, it seems like we had quite the range of weekends! Some of us spent our time cozied up with knitting projects, while others embraced outdoor adventures like biking and concerts. One of you even prepared for the daunting task of repainting a ceiling! And I know I'm not alone in feeling that post-vacation social battery drain. Remember, it's okay to take time for yourself to recharge and enjoy those quiet moments with knitting and a good book.
Questions
We had some great questions during the Q&A, and I did my best to provide helpful answers. Here are a few highlights:
Q: How can I prevent my stitches from slanting when folding hems?
A: Stitch markers can be incredibly helpful for keeping your stitches on track. Place them evenly around your folded hem, pinning your hem to where it should be stitched.
Q: What's the ideal number of rows for sleeves, and should I block before or after seaming?
A: It depends on your preference and the pattern instructions. I often find it better to weave in ends before blocking so that the stitches settle when being blocked. However, blocking before seaming can be helpful so your stitches sit more evenly.
Q: Help! I have gaps in my raglan sleeves. How do I fix them?
A: Don't worry, this is a common issue. You can easily fix gaps by weaving in some waste yarn or leftover tails through the back of the stitches.
Q: What's the best way to block my finished tee?
A: I shared my favorite blocking method during the livestream: soaking, gently squeezing, and then rolling the garment in towels before laying it flat to dry. But if you're looking for detailed, step-by-step instructions that work for any knitted garment, be sure to check out my blog post: A Complete Guide to Taking Care of Bulky Knits. It's packed with tips and tricks to help you achieve a beautifully finished project.
Q: Do I need to block my tee every time I wash it?
A: Nope! The first block is the most important for setting the stitches. After that, you can simply lay your knit flat to dry.
Tips
During the livestream, I shared some helpful tips to get those finishing touches just right:
Blocking Works Wonders: If your stitches are looking a little uneven or wonky, don't worry. Blocking can often help smooth things out and give your knitting a more polished look. Just remember to be gentle when handling your wet garment, so you don't accidentally stretch or distort the stitches.
Weaving in Ends with Ease: We all have those pesky yarn tails to deal with, but weaving in ends doesn't have to be a chore. I showed you a simple and effective method for weaving along folded edges, as well as how to use leftover yarn to discreetly fix any gaps or holes.
Taming Wonky Increase Stitches: If you have an increase stitch that's looking a little off, don't stress. With a bit of extra yarn and some simple techniques like duplicate stitching, you can easily blend it in with the rest of your stitches.
Blocking made easy: Blocking kits are a fantastic tool for achieving a polished look. But if you don't have one, you can still get great results by laying your garment out on a clean surface (like a towel or even a garbage bag) to dry. Just make sure to shape it gently and let it air dry completely.
But if you do want to invest in some blocking essentials, head over to my Amazon storefront. I've got everything you need to block your finished garments and get them looking as awesome as they deserve!
Homework Time (I Can't Believe It's the End!)
It's hard to believe, but we're already at the end of our knit-along journey! Your final homework for this week is to finish weaving in those ends and fold up your hems. It might take a bit of time, but I promise you, the feeling of accomplishment when you're holding your finished Staple Tee in your hands will be so worth it. I can't wait to see all your beautiful creations in our final livestream next week! Don't forget to submit your photos for a chance to win some awesome prizes – you deserve it!
Upcoming Livestream Preview
Next Up: Final Celebration + Prizes (July 28th, 12 PM EST)
Next week, we're throwing a virtual party to celebrate all your hard work! Join us on July 28th at 12 PM EST for our grand finale livestream, where we'll be randomly selecting prize winners from everyone who submitted their finished Staple Tees. Don't forget, the deadline to submit is July 27th at 11:59 PM EST! So come ready to show off your gorgeous creations and celebrate with the community. Can't wait to see you there!
Additional Resources
The countdown is on! You have until July 27th at 11:59 PM EST to submit your finished Staple Tee for our prize drawing. Staple Tee Submission Form
If you're new to blocking or want a more detailed tutorial, my blog post, A Complete Guide to Taking Care of Bulky Knits, has got you covered. And if you need any tools, like blocking mats, wires, pins, or wool wash, you can find all my favorites on my Amazon storefront.
Bonus Tip! Download my FREE Gauge Log + Project Tracker! It's super handy for keeping track of your gauge for your Staple Tee.


The Staple Tee
Don't miss out on knitting the perfect tee! Grab your Staple Tee pattern now and join the KAL!
Missed the last livestream? No worries! Catch the replay to join in on the fun, whether you're #teamlive or #teamreplay!
〰️
Shop My Favorite Supplies
〰️ Shop My Favorite Supplies
Check out these tools & yarns that I Love (and You Might Too!)
Please note that this blog post contains affiliate links. If you make a purchase after clicking one of these links, I earn some yarn money at no extra cost to you!

Amazon
Blocking your Staple Tee (or any hand-knit project) is the key to a professional finish and one of my go-to blocking tools is the KnitIQ Pack of 9 Blocking Mats. They interlock seamlessly, so you can create larger layouts for bigger projects, and they come with 150 rustproof T-pins to keep your knits in place as they dry.
Bonus: The KnitIQ mats are also great for expanding your existing blocking setup, so you can tackle even those super-sized projects like blankets and ponchos!

Twice Sheared Sheep
Stitch markers are a must-have for any knitting project, especially when shaping sleeves! Make your knitting more fun and organized with these adorable Pastel Rainbow Cast Melody Clips from Twice Sheared Sheep. They're cute, functional, and totally snag-free! Treat yourself to a set (or two!) and make your knitting even more fun.

Arcane Fiber Works
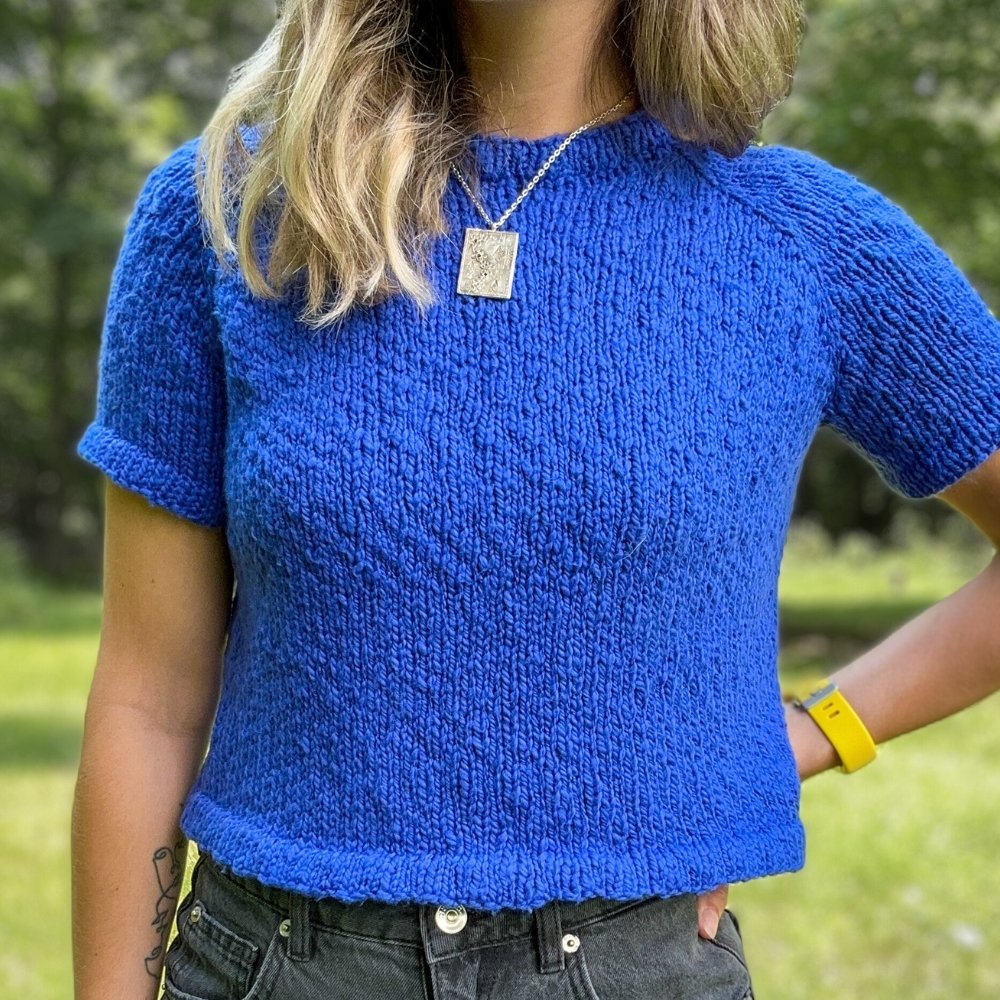
I'm so excited about one of the prizes we'll be giving away in next week's livestream (5 skeins of the stunning City Skyline fingering weight yarn (at $125 value!). Just look at those vibrant blues!
And guess what? You can snag this exact yarn, or any other colorway that catches your eye, over at Arcane Fibre Works.
Plus, if you use the code NEWWAVEKNITTING at checkout, you'll get 10% off!

Kollage Square Needles
The square shape of these knitting needles makes them ergonomic, which means they are easier on your hands, wrists, and arms! These are my go-to needles for preventing arm pain.
Use code NEWWAVE10 for 10% off your order!
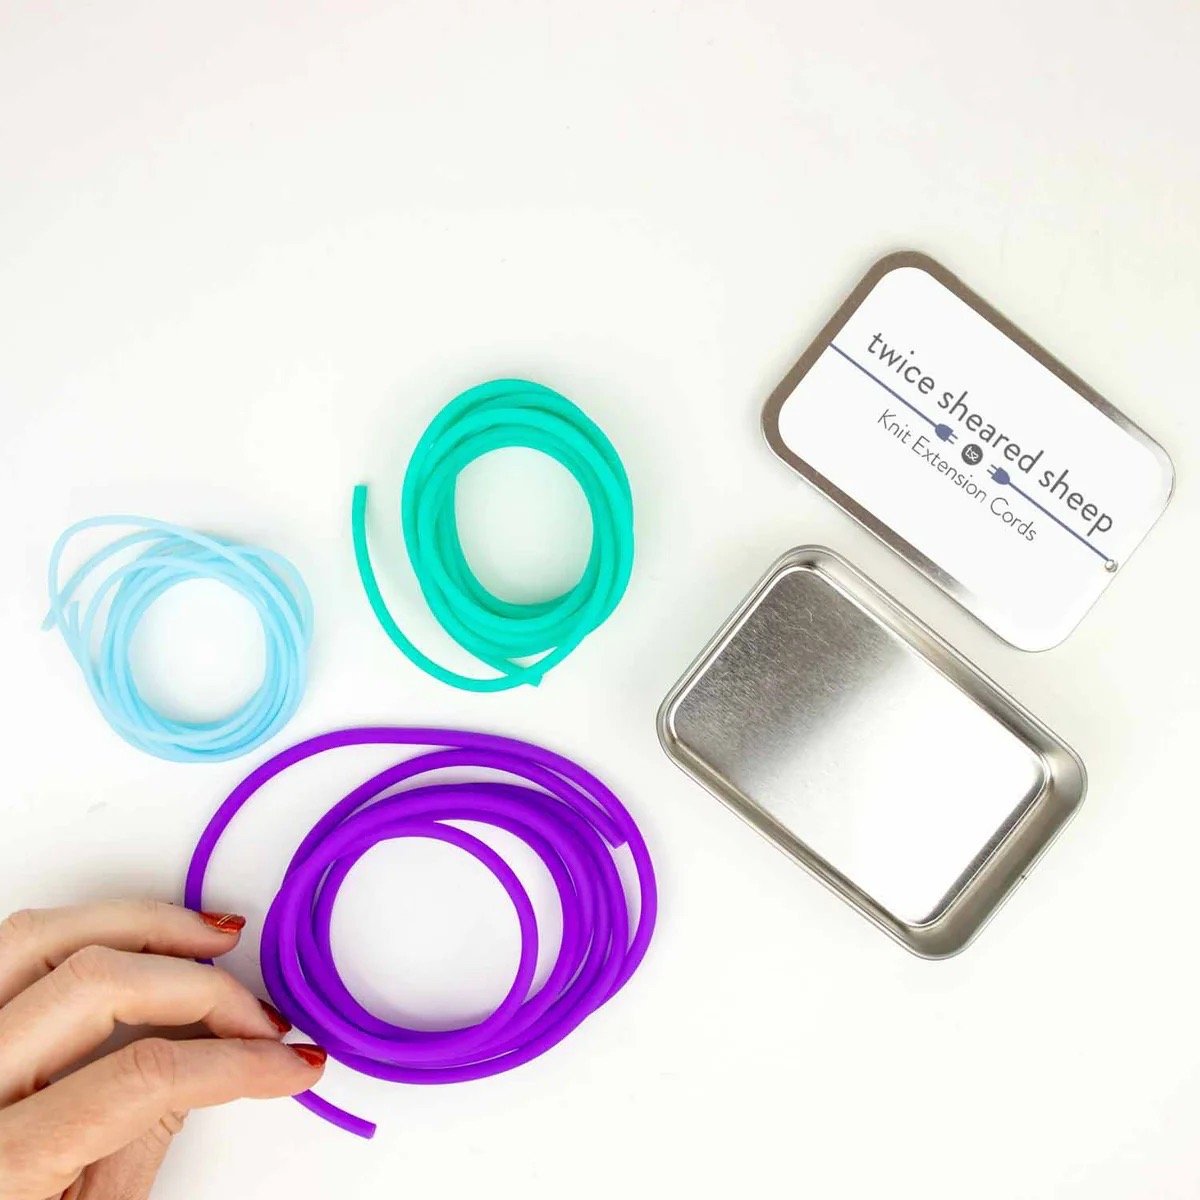
Twice Sheared Sheep
Need a little extra wiggle room to try on your Staple Tee as you knit? Twice Sheared Sheep's Knit Extension Cords are a lifesaver! Just slide these genius little tubes onto your needle tips, and voilà – instant cord extension! They grip your stitches tight (even on the tippy-tip of your needles!), so you can try on your work in progress without worrying about dropping stitches.
Don't forget to share your sleeve progress and ask any questions you have on Discord or in the comments below. We're in the home stretch, knitting pals! 🎉
Relive the excitement of our final Staple Tee KAL livestream! Join us as we celebrate your beautiful creations, announce prize winners, and share our gratitude for this amazing community.