
When you’re ready to move beyond knitting variations of rectangles, it is essential to learn how to shape your knits. To shape your knits, you will have to decrease and/or increase the amount of stitches on your needles. In this blog post, we are focusing on one of the most popular ways to increase with the M1R and M1L techniques. These techniques may seem tricky at first, but with a little practice, you'll be able to execute them with ease and take your knitting to the next level. So, let's dive into the world of M1L and M1R!
Interested in learning how to decrease?
Check out this tutorial for the most commonly used knitting decreases!
What are M1R and M1L?
Before we jump into the step-by-step guide, let's first discuss what M1R and M1L are, what they’re used for, and how they differ from each other.
M1R (Make One Right) and M1L (Make One Left) are knitting techniques called increases that are used to add stitches to your work. The main difference between M1R and M1L is the direction in which the new stitch is created. M1R is worked from back to front, while M1L is worked from front to back. By creating stitches in opposite directions with these techniques, stiches made with M1R lean to the right, and stitches made with M1L lean to the left.
These increases are useful for shaping your knitting and creating unique designs. M1R and M1L can be used in a variety of patterns, including cables, lace, and colorwork. I even include them in my Staple Skirt and Staple Sock patterns!
By mastering M1R and M1L, you'll be able to add new stitches seamlessly and create beautiful, professional-looking knitting projects.
The Staple Skirt
M1L and M1R are used on the top half of the Staple Skirt to create a fitted design.

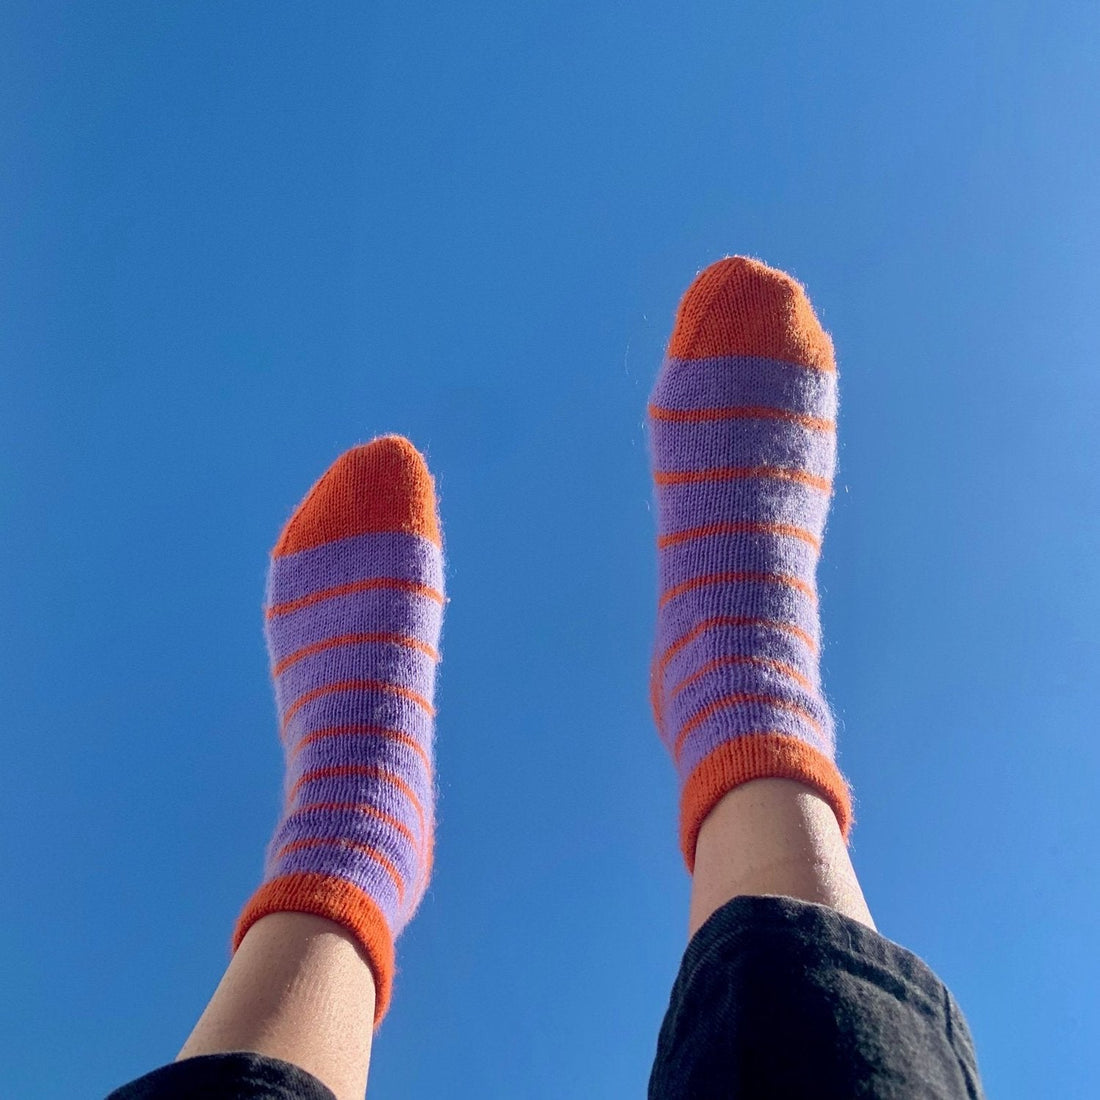
The Staple Sock
M1L and M1R are used to increase the amount of stitches near the ankle and before the heel on the Staple Sock.

M1R + M1L Step-By-Step Guide
Now that we've covered what M1R and M1L are (as well as their benefits and differences), let's dive into the step-by-step guide for each technique.
How to M1R (Make One Right)
Step 1
Locate the horizontal bar between the stitches on your left and right needles.

Step 2
Insert your left needle from back to front under the horizontal bar.

Step 3
Insert your right needle in the front leg of the stitch you just picked up.

Step 4
Knit it as normal.

Step 5
Admire your new stitch that will lean to the right!

Video Tutorial: M1R
How to M1L (Make One Left)
Step 1
Locate the horizontal bar between the stitches on your left and right needles.

Step 2
Insert your left needle from front to back under the horizontal bar.

Step 3
Insert your right needle in the back leg of the stitch you just picked up.

Step 4
Knit the stitch through the back loop.

Step 5
Admire your new stitch that will lean to the left!

Video Tutorial: M1L
Practice and Application
Now that you know how to execute both M1R and M1L, it's time to practice! Work on a swatch or small project to get comfortable with the techniques. And don't be afraid to incorporate M1R and M1L into your own designs! These techniques are incredibly versatile and can be used in a variety of knitting patterns.
M1R and M1L are essential techniques to add to your knitting repertoire. They allow you to shape your knitting and create unique designs. By following the step-by-step tutorials and practicing, you'll be able to execute these techniques with ease. So grab your needles and yarn, and start creating!
Want a tutorial for a specific knitting technique? Let me know in the comments! And be sure to sign-up for the New Wave Knitting Circle Newsletter so you never miss a blog post or tutorial.